How to make Roman Blinds
Tools and Equipment
Fabric
Lining
Nylon Cord
Small Plastic or Brass Rings
Acorn
Cleat
Battens for Top and Bottom (Mitre 10) size 27 &28
Brackets and Screws
Lengths of Fibreglass Rod (Optional)
Screw Eyes
Cord Joiner (Optional)
Making the Blind
1) Cut out the fabrics
It is essential to the finished product that the fabrics are cut perfectly straight.
Main fabric = measurement of the finished blind +60mm to the width and 400mm to the length.
Lining fabric = measurement of the finished blind + 400mm to the length.
(This 400mm allowance allows for a 190mm turning at the bottom of the blind, 100mm at the top to allow for fixing to the batten, and 20mm at each pleat casing) Shorter blinds may not need as much allowance.
2) Join fabric and lining
Lay lining on top of fabric with right sides facing. Make a pleat in the main fabric so that the side edges of fabric and lining match. Pin, then stitch the side seams taking 15mm for seams. Trim slightly then press seams open.
3) Press the Blind
Turn right sides out and position so lining is centred on the main fabric. Press to get crisp edges to the blind.
4) Stitch casing at lower edge
Zigzag or overlock both top and bottom edges. Turn up 10mm across lower edge of blind, press then turn up 40mm for casing. Press and stitch across blind.
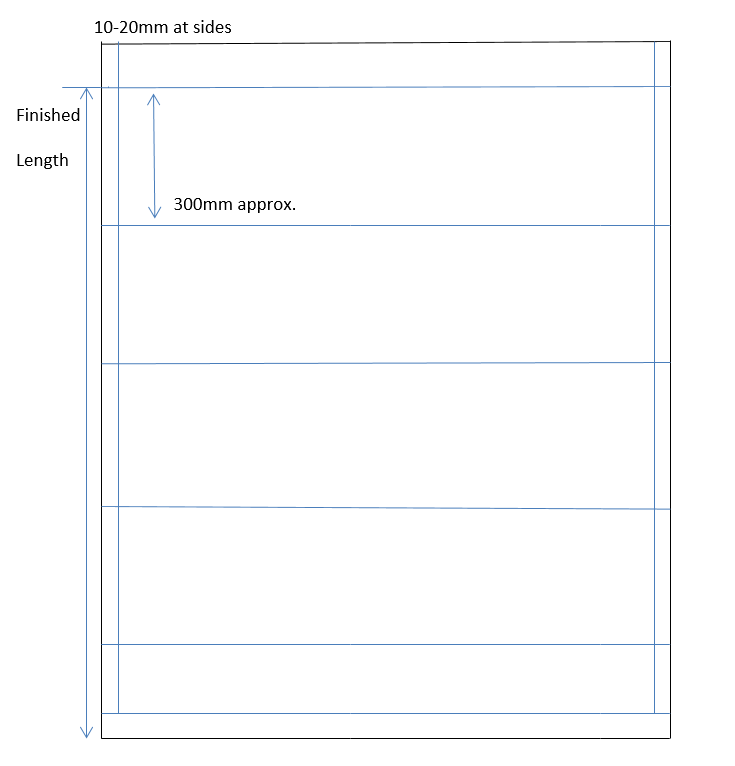
5) Stitching casings up the blind
These casings determine the folds of the blind when it is pulled up.
Divide the finished length of blind by 300mm (e.g. 1.500 ÷ .300 = 5) to get approximate amount of casings and distance between casings. A 20mm seam allowance for each casing needs to be allowed for at this stage, so need to adjust the distance between casings.
Measure carefully and mark the position of each casing with lines. Fold blind across at each line of markings and pin. Allowing a 10mm seam, sew across each casing. Lie blind flat and measure from the bottom of blind the finished length, mark this and stitch across.
6) Stitch the rings in place
The blind is pulled up by cords running through small plastic or brass curtain rings stitched to the back of the blind casings. Rings should be spaced about 600mm apart, across the row. Work out how many rings will fit across the blind, positioning one 15mm in from each side, with the rest spaced evenly in between, for a small blind you will need to place one in the middle. Stitch rings in place by hand to the top of each casing.
7) Lower batten
Cut batten to required length and cover ends of batten with small piece of fabric. Place in lower casing.
8) Fibreglass rods
The use of fibreglass rods is optional, for a small blind they are not really necessary, but if the blind is a large one (width wise) rods placed in each of the casings will give stability.
Cut to required length, slide into the casing pocket and stitch ends closed.
9) Cord
Decide which side of the blind you want the pull cord to hang. Lay blind flat with lining facing you. Don’t forget everything is now back to front, so you position the cord to hang at the opposite side to your finished requirement.
